Membership
How to upgrade membership
To upgrade your membership, you will simply need to verify your personal email and phone number.
Upgrade to Membership (Parent/Public Member)
1. Log in to the EdCity member ‘Basic Information‘ page and click on ‘Upgrade Membership’.

2. Enter a mobile phone number that can receive SMS messages.

3. Enter the 6-digit verification code sent via SMS.

4. Complete the mobile phone verification and click ‘Next’.

5. Update your personal information (optional) and click ‘Update’.

6. The upgrade is completed.

How to Upgrade to Student Membership
To enjoy the suite of personalised services, you can upgrade your school-based student account to a Student Membership. This allows you to manage your account information independently and permanently view your complete user profile and activity records on EdCity, unaffected by grade promotions or school transfers.
1. Log in to the EdCity member ‘Basic Information‘ page and click on ‘Upgrade to Student Membership’.

2. Enter Your Personal Email. (Do not use the school-provided student email.)

You will receive a membership upgrade email from EdCity at your personal email.

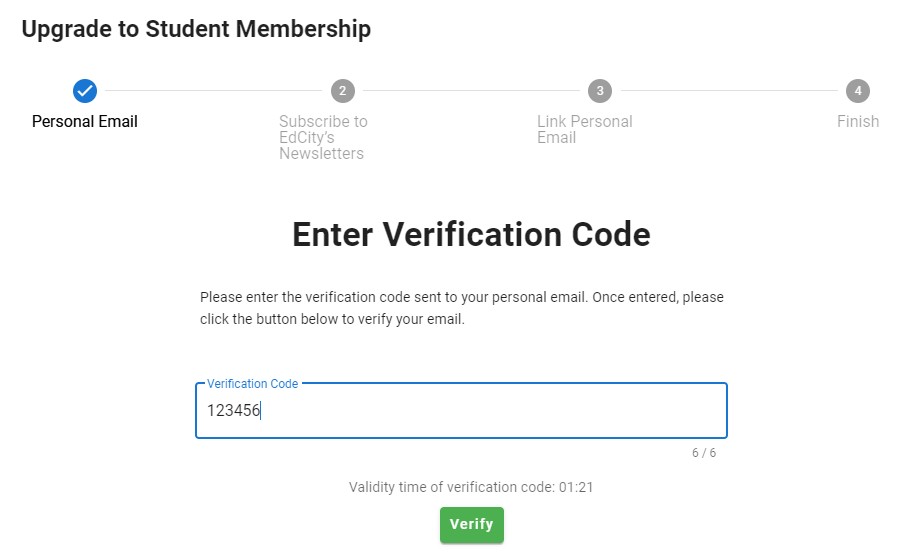
3. Enter the verification code found in the email.

4. Update your subscription preferences.

5. Create a new password for logging in with your personal email.

6. The upgrade is completed.

How to Create a Family Group
Once students and parents upgrade to membership, parents can create family groups and link family members through the EdCity system.
Step 1: Create a Family and Link Family Members
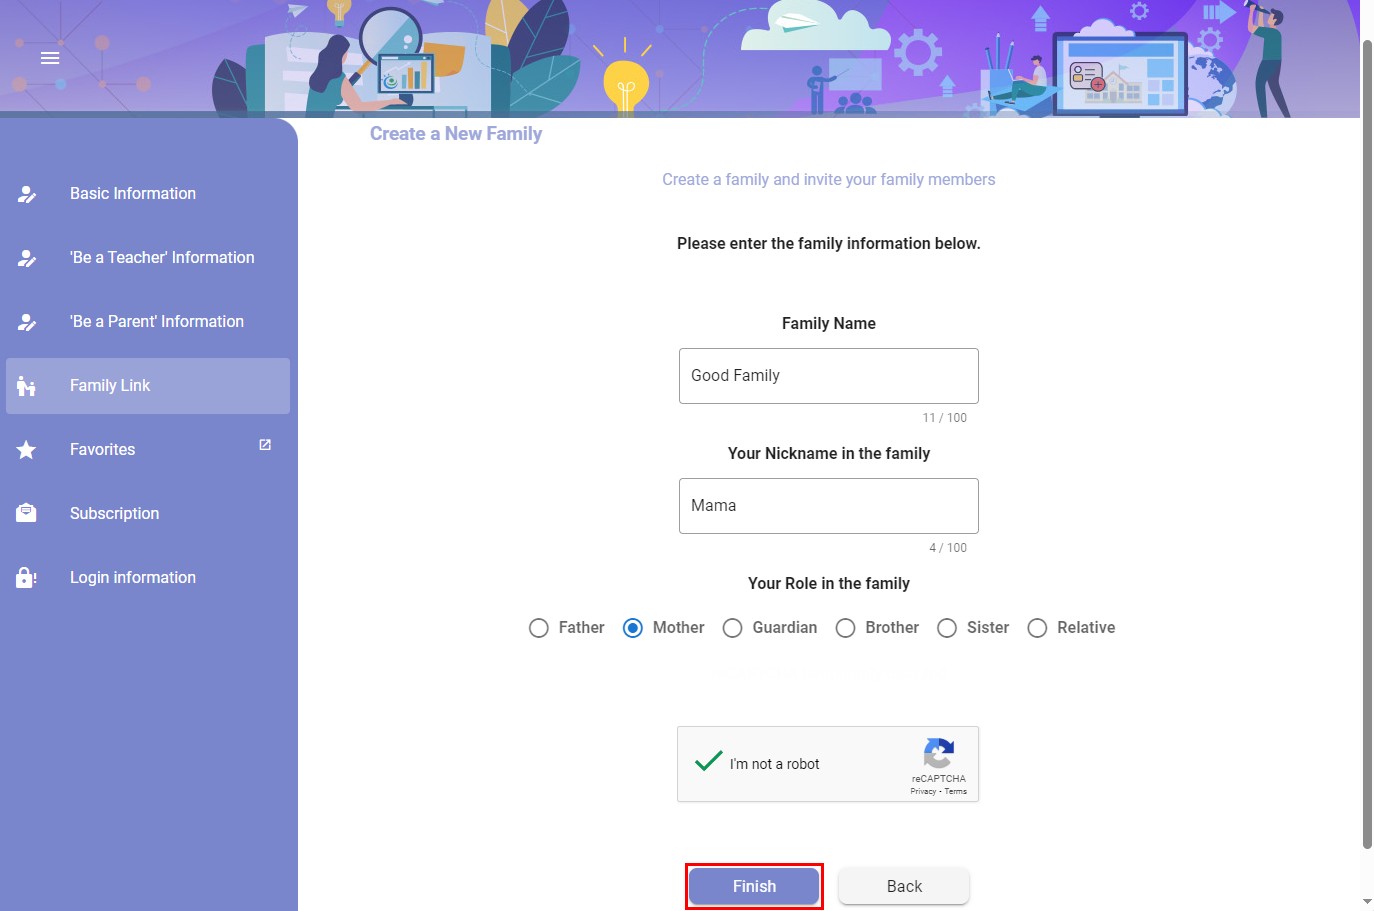
1. In the settings page, click on ‘Family Link’ and then ‘Create a New Family’.

2. Enter the family group information (family group name and your information).

3. Click ‘Invite Family Member(s)’.

4. You can invite users either by sending a link or by having them enter the family ID and verification code to join the family.

5. Students/other family members can log in and request to join the family using the link.

6. The family administrator can accept or decline the requests.

7. After the family administrator allows members to join, they can view the member list in the overview.

Easy Login for Seamless Access to EdCity Services
For a better user experience and to meet various needs, members and school-based accounts can log in with flexible options, including:
- Username and password
- One-Time Password Login: Receive a one-time password via your personal email
- QR Code Login (application required for Simple Login Service)
Furthermore, EdCity provides a Single Sign-On (SSO) service called EdConnect, designed for schools, government agencies, non-profits, and private companies. Once approved and set up, members can easily access other related systems using their EdCity accounts. Click here for more details.